

The Guest tab in the Event Dashboard allows you to manually check in guests, scan tickets, and remove check-ins when needed.
✅ Why It Matters
Checking guests in through the Event Dashboard helps organizers:
📊 Keep an accurate record of guest attendance.
⏱️ Monitor entry activity in real time.
🛡️ Prevent duplicate or unauthorized ticket use.
👀 Quickly verify whether a ticket has already been scanned.
🔄 Correct accidental check-ins by removing them when necessary.
How to Check-in Guests
There are two ways to check in a guest:
Through Search
Using the Check-in Button
Method 1: Check In Through Search
In the search bar, enter any of the following:
🎫 Guest Ticket Number
🧾 Order Number
👤 Guest Name
✉️ Email Address
Locate the guest's order.
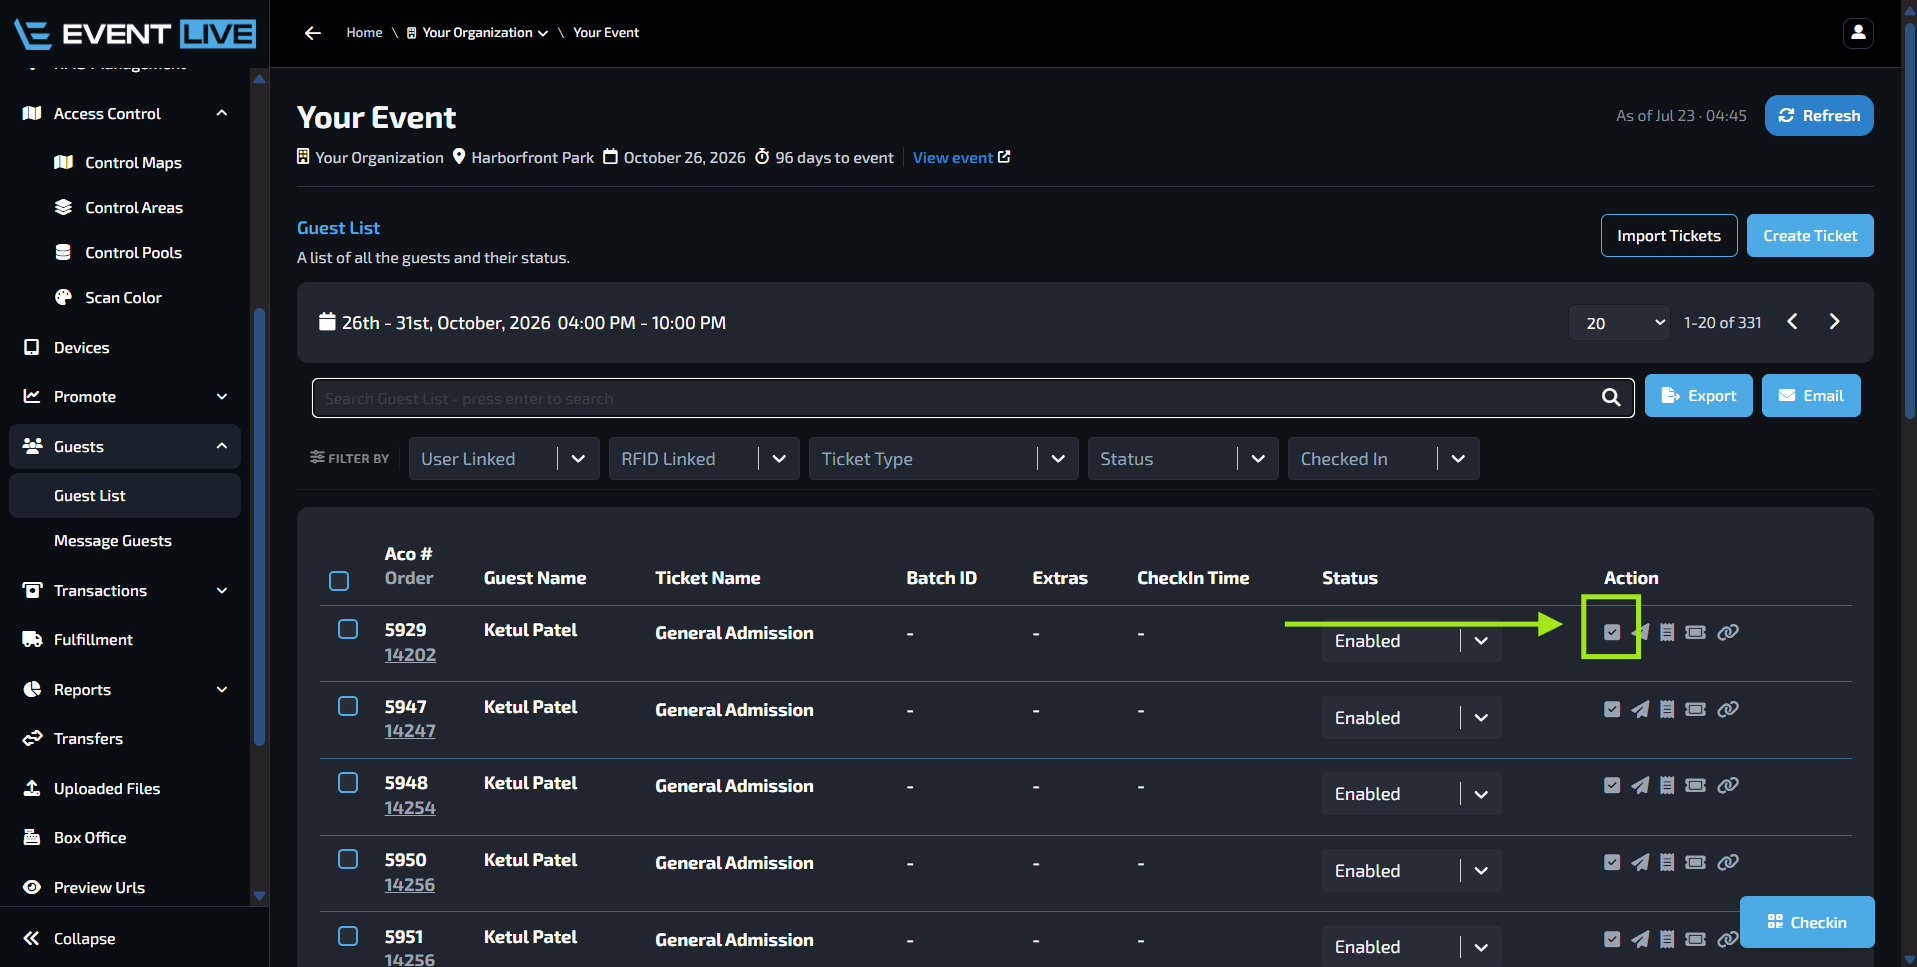
Under the Actions column, click the Check-in (✓) icon.
The Manage Check-in window will appear.
Select the appropriate:
Control Map
Control Area
Check-in Type
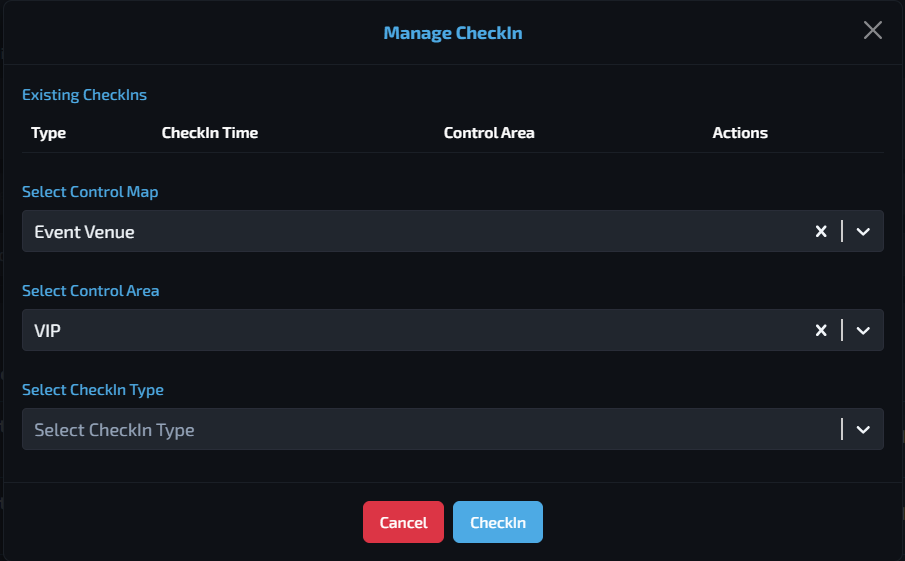
Click Check-in.
✅ The guest is now successfully checked in.
Method 2: Check In Using the Check-in Button
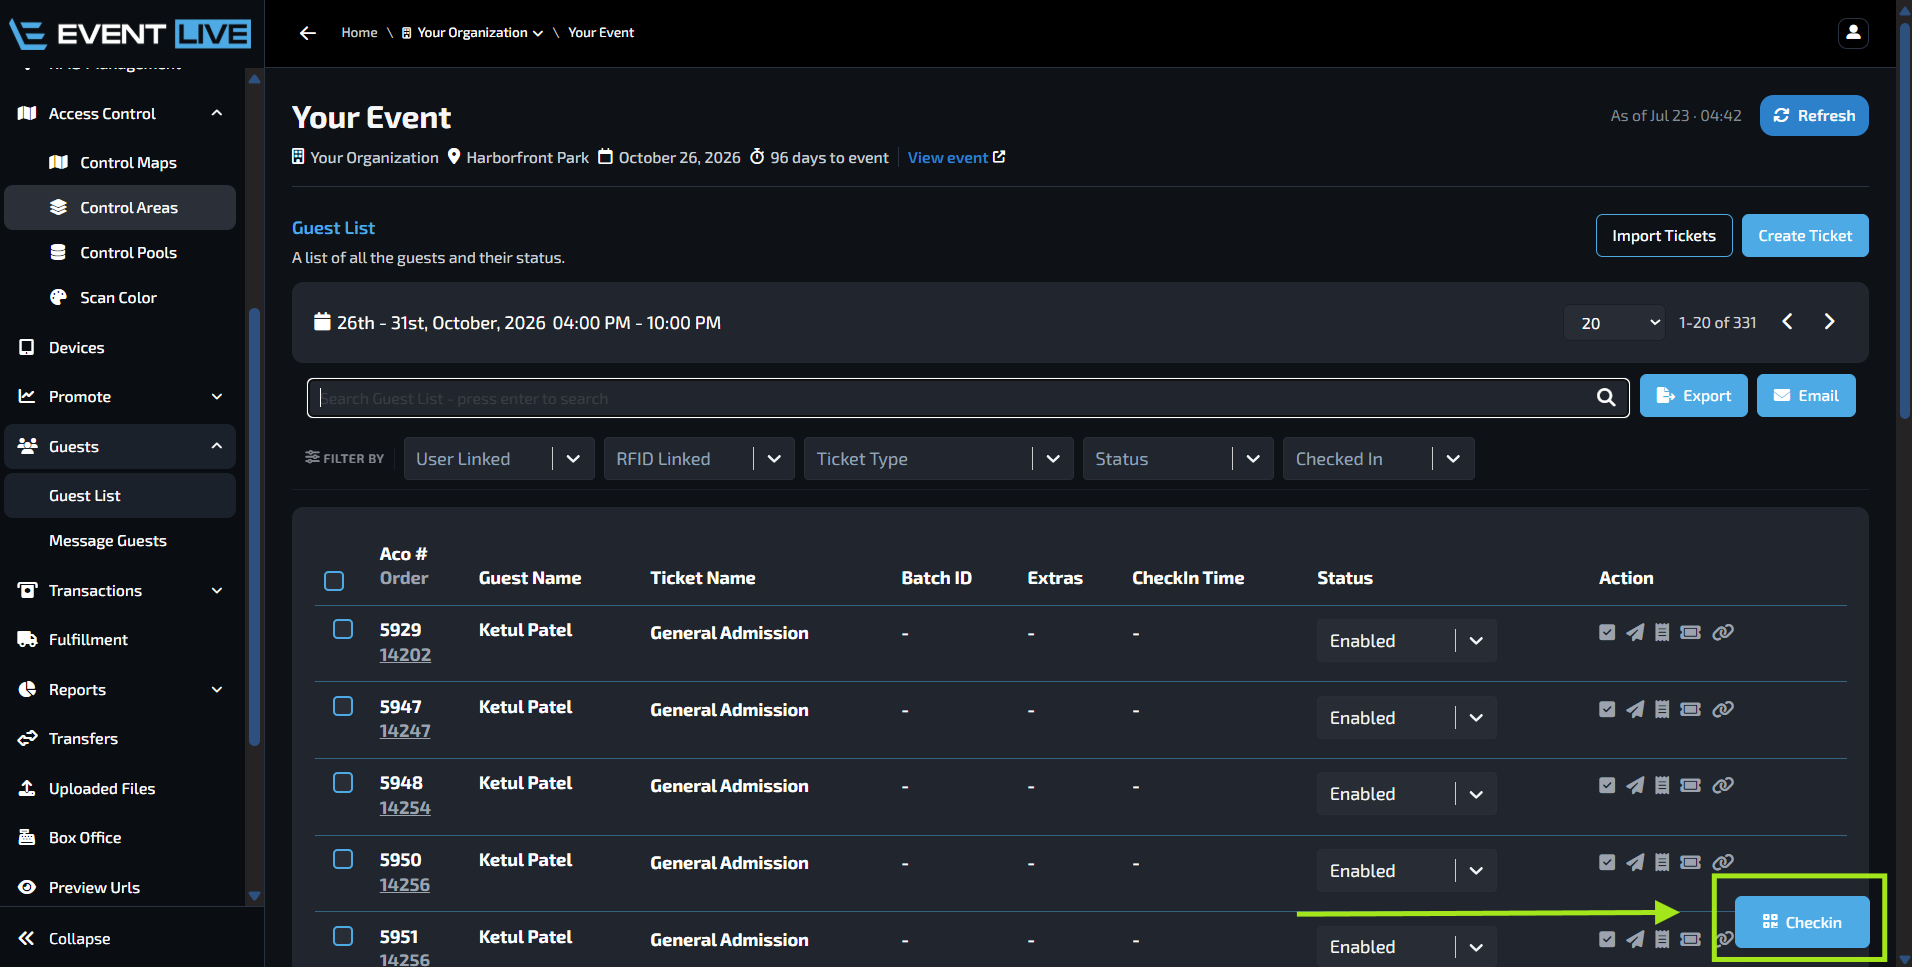
Click the Check-in button located in the bottom-right corner of the screen.
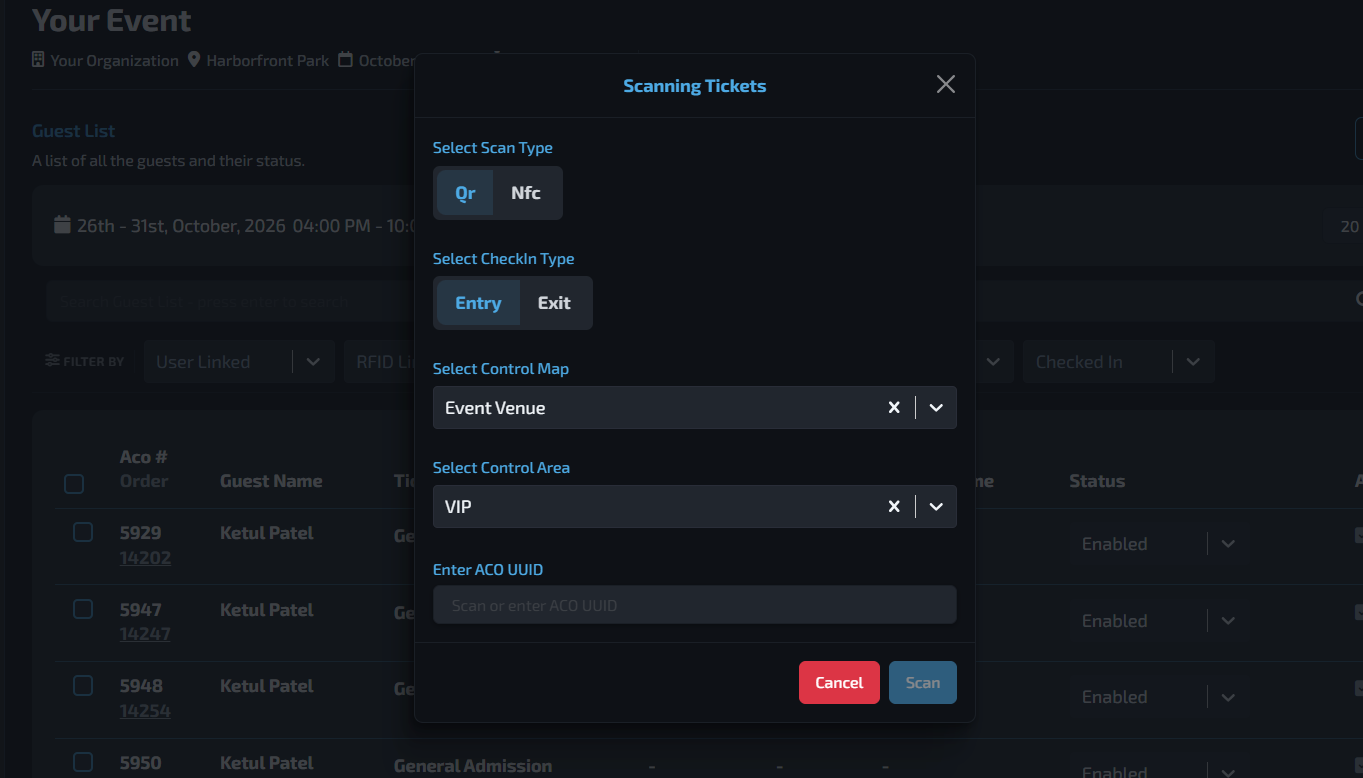
Select the following:
Scan Type
Control Map
Control Area
Then enter the:
ACO UUID
✅ Verify a Successful Check-in

After a successful check-in, the Check-in Time column will display the date and time the ticket was scanned.
🕒 This confirms that the ticket has been successfully checked in.
🔄 Remove a Check-in
Locate the guest in the Guest tab.
Under the Actions column, click the Check-in (✓) icon.
Under Existing Check-ins, locate the check-in entry.
Click Remove in the Actions column.
✅ The check-in will be removed.
FAQs
Can I search for a guest using multiple types of information?
Yes. You can search using the Guest Ticket Number, Order Number, Guest Name, or Email Address.
What happens if a ticket has already been checked in?
The ticket will show an existing check-in with its recorded check-in time. If necessary, an authorized user can remove the check-in to allow the ticket to be scanned again.
Can removing a check-in delete the guest's order?
No. Removing a check-in only clears the recorded entry. It does not cancel the order, invalidate the ticket, or remove the guest from the event.