
This guide explains how to set up the Point of Sale (POS) on the EVENT Live Website and how to use EventLive App on the Mobile or the Tablet with Android/IOS App during your event.
From creating POS ticket channels to accepting payments and printing receipts, this article ensures you’re fully equipped to handle event-day sales efficiently.
POS Setup (Website Page)
For products to appear on the Checkout Tab of the Mobile App, you must first set the POS on the EVENT Live Website first. This setup includes:
Creating POS Ticket Channels
Adding products to POS Channels
Configuring POS settings
I. Creating POS Ticket Channels
Go to your Event Dashboard on the EVENT Live Website
Click Tickets on the side panel and select Ticket Channels
From the Ticket Channels options row, select Point of Sale

Click Create Ticket Channel
Fill out the required fields:
Name
Layout Type
List
Grid
Click Save
You can create multiple POS Channels to better organize your products.
For example, you may want to separate channels for Event Tickets, Food, Drinks, or Merchandise. This makes it easier for staff to navigate and for customers to check out quickly.
To create additional POS Channels, simply repeat Steps 4 and 5.
[insert a side-by-side video showing What is Setup in the Website vs How it Appears on the Mobile App]
II. POS Channel Management
The POS Channel page provides several tools to help you manage how your POS appears on the Mobile App.
POS Channel Tools

Status Button: Enable or disable a POS Channel without deleting it. This lets you temporarily hide a channel from the Mobile App whenever needed.
Delete Button: Permanently removes the POS Channel. Use this with caution, as deleted channels cannot be recovered.
Item Tools

Add Items: Select and add a product to the POS Channels.
Reorder Items: Arrange items in the order you want them to appear on the Mobile App. Items display from top to bottom.
Delete Button: Removes a specific item from the POS Channel.
III. Adding Products to POS Channels
Click the POS Channel you want to add products to
Click Add Items
Select the product you want to include
Click Add Item if adding multiple products
Repeat as needed
Click Save
IV. POS Configuration
From the side panel, click Settings
Select POS Configuration
Toggle POS Email Sending Status on or off
Toggle Tip Collection on or off to provide customer the option to send tip. Click Edit to customize tips:
Choose Percentage or Fixed Amount
Set the tip value
📌 Note: On the Mobile App, staff can also customize the tip value during checkout.
[insert a side-by-side video showing What is Setup in the Website vs How it Appears on the Mobile App]
Checkout Process on the Mobile App
Once your POS is set up on the website, you’re ready to process orders using the EVENT Live Mobile App. This section covers how to select products, accept payments, and issue receipts during checkout.
I. Selecting Products
Open the EVENT Live Pro App.
On the Event Tab, search for and select your event

On the bottom main panel, tap the Checkout Tab

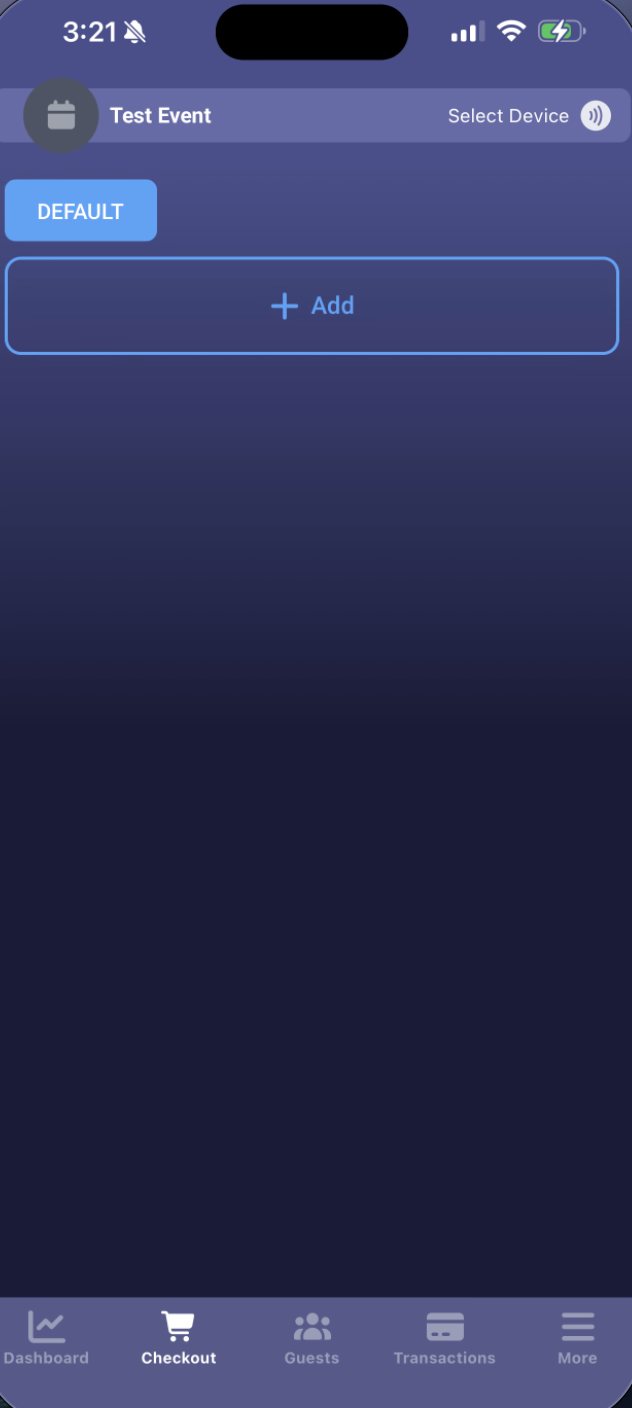
The Checkout page will display all the POS Channels you created
Swipe or tap between channels to view available products

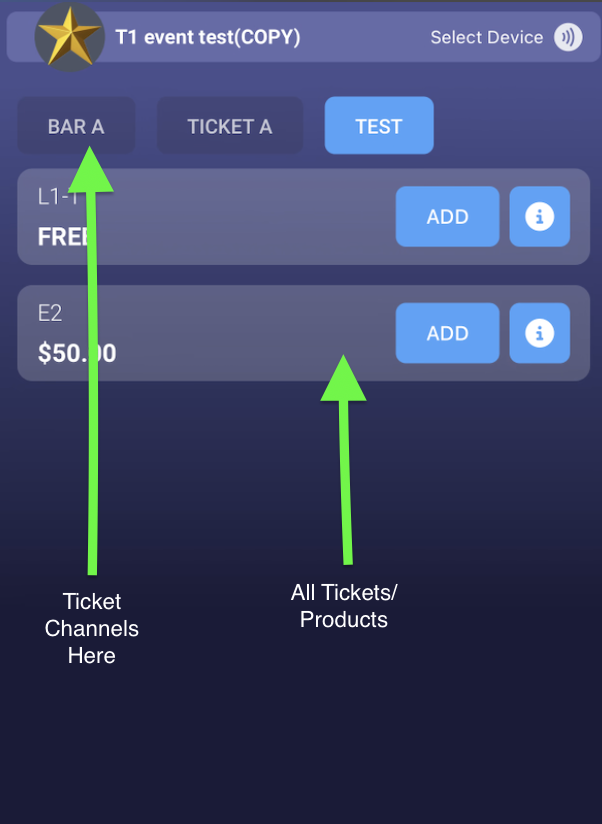
Tap the information icon to view product details

Tap Add or click the product to add it to the cart
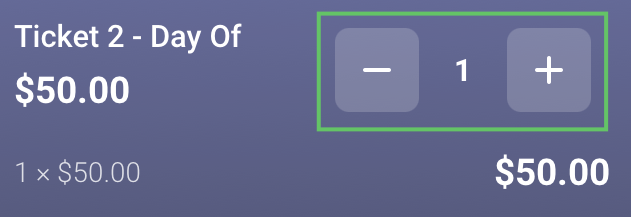
Manage selected products:
Use + / − buttons to adjust quantities
Use Clear Order to remove all items
Once ready, tap Checkout
II. Payment
Review the order details
If applicable, tap Have a promo code? to apply a discount

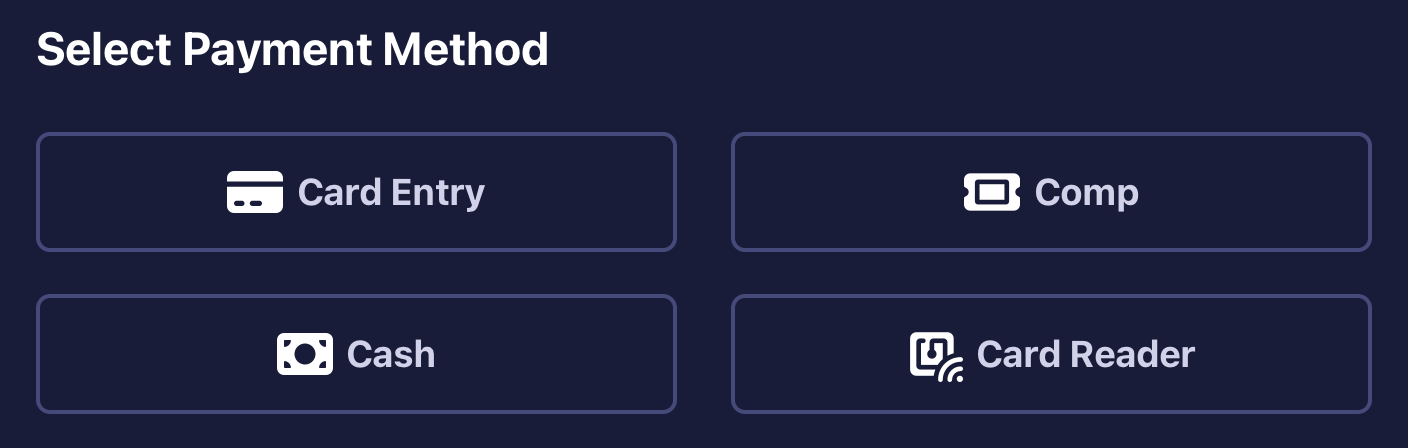
Select a payment method:
Card Entry – manually enter card details
Comp – complimentary order
Cash – full cash payment
Card Reader – tap-to-pay using a connected device
If Tip Collection is enabled, the Tip Page will appear

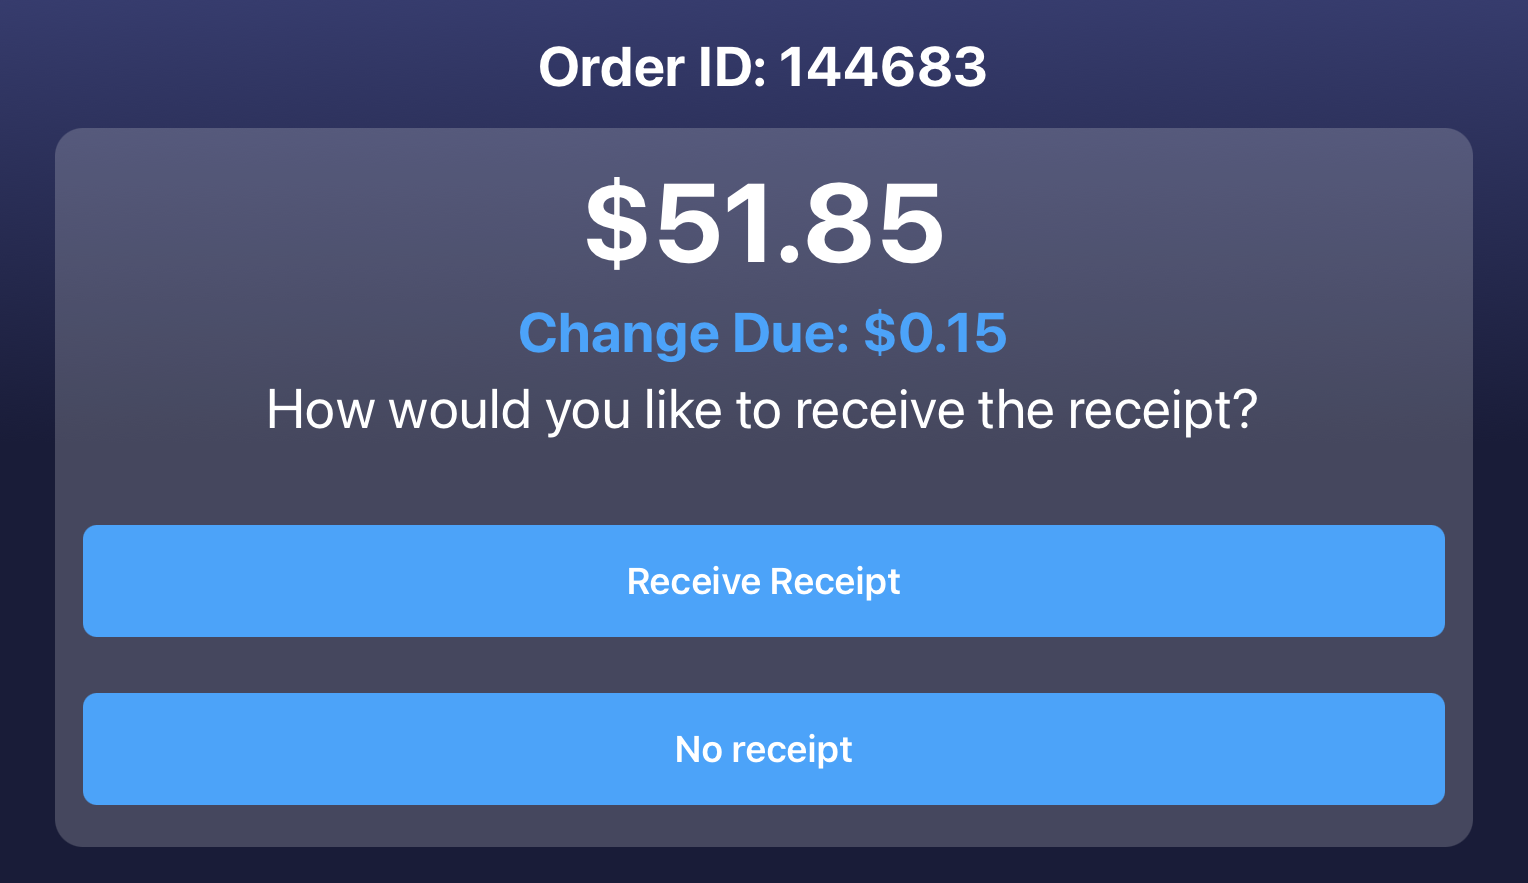
Complete the payment based on the selected method
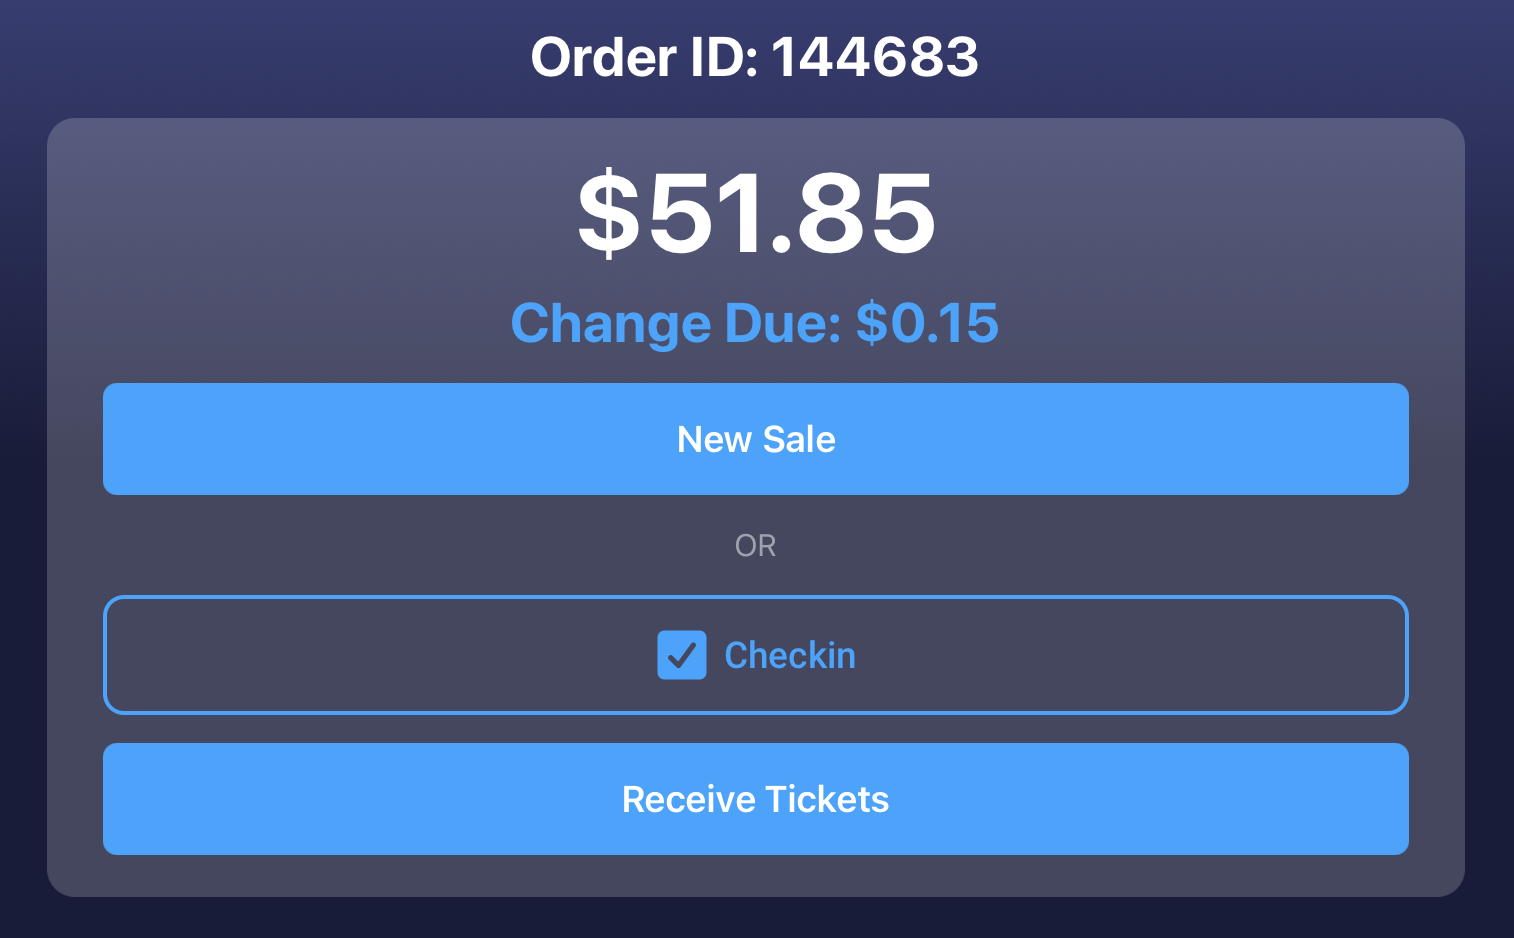
After payment confirmation, choose a receipt option:
Receive Receipt
No Receipt
III. Printing of Receipt and Checking-in of Orders
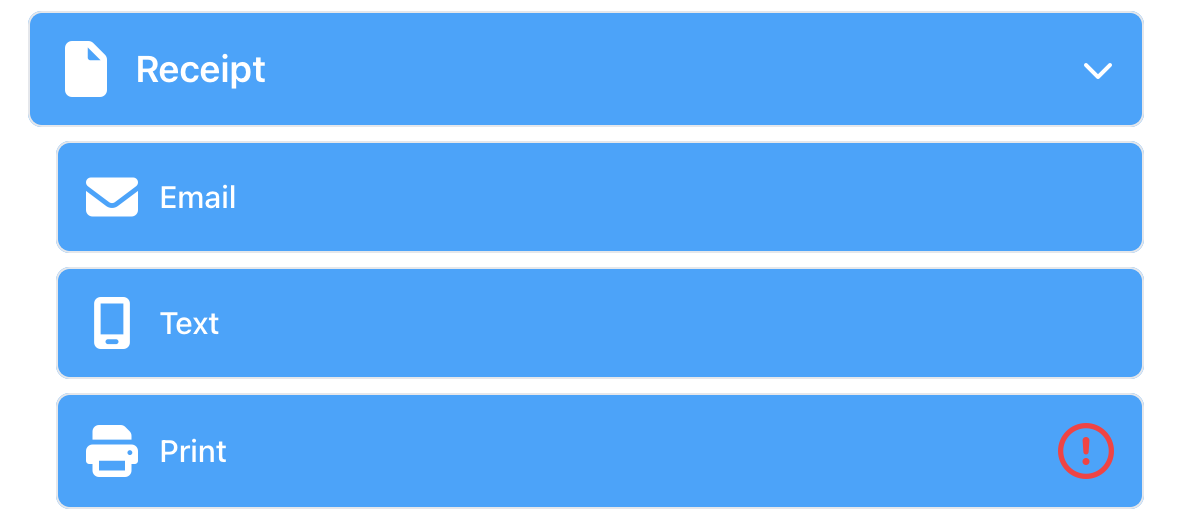
If Receive Receipt is selected, you may:
Print or Send Receipt
Email
Text
Print Physical Copy
Requires a Bluetooth-connected printer
Location services must be enabled
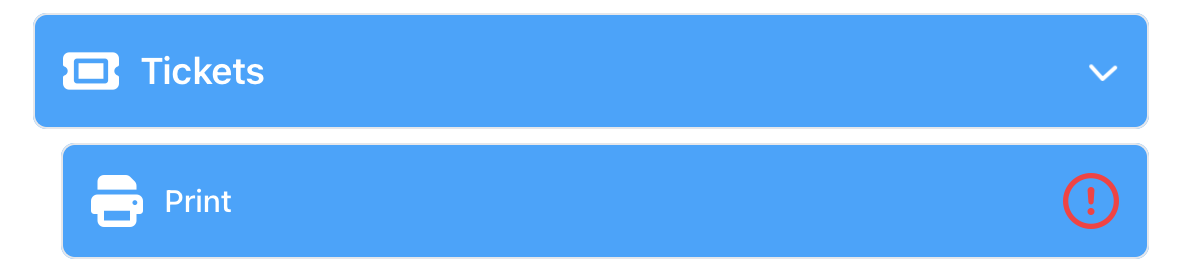
Print Tickets
Prints physical tickets
Requires Bluetooth-connected printer and Location must also be enabled
Check-in Tickets
Tap Check-in
Confirm check-in to complete the process
✅ Why Point of Sale Matters
Speeds up checkout: Helps staff complete sales faster and reduces long lines.
Keeps products organized: Groups tickets and items into clear categories like Food, Drinks, and Merchandise.
Reduces mistakes: Clear product listings and pricing help avoid checkout errors.
Supports multiple payment options: Allows customers to pay by card, cash, comp, or card reader.
Tracks sales automatically: Every transaction is recorded for accurate reporting and review.
Creates a professional experience: Receipts, tipping options, and quick check-in make events run smoothly.