
Event Live now offers a new pricing structure that allows admins to set the prices customers will see directly on the event listing page. This guide explains how to configure product prices, how pricing is calculated, and what to expect in upcoming updates.
Prices can only be set at the sub-layer level, not the master ticket layer.
These prices will be displayed to customers on the event listing page for all products.
How Pricing Is Calculated
The total price shown to customers is a combination of several components: 1. Base Ticket Price
Editable field
When set, this automatically calculates the total all-in price including fees
Event Fees / Venue Fees / Taxes
Event Live Platform Fees
Stripe Processing Fees
Formula:
Base Ticket Price + Event / Venue Fees / Taxes + Event Live Platform Fees + Stripe Fees(Percentage) = Total All-In Price
All fees are configured and managed at the master ticket layer, not at the sub-layer level.
Admins can either:
Set a base price to automatically calculate the total, or
Set a total all-in price (this field is editable) shown to customers, which will then calculate the base price automatically.
Setting All-in Price
All-Inclusive Pricing for a ticket can only be configured at the Child Layer. This ensures accurate pricing calculations and full transparency for both admins and customers.
On the ticket listing, you will see the following price types:
Net Price
The amount you receive after merchant fees are deducted.Customer-Paid Price / All-In Price
The total price paid by the customer, including all applicable fees.Ticket Price / Base Price
The system-calculated base ticket amount derived from the All-In Price.
You can set your ticket price using either of the following methods:
Net Price, or
All-In Price
Net Price Input Mode
Allows you to input and edit the Net Price (price after merchant fees). All other Price types will be greyed out and cannot be edited.
Upon creation of child layer, in the Price Section, under Price Input Mode, select Net Price
Enter the Net Price of the ticket
Upon entering the value of the Net price, the rest of the price types will also be filled out automatically and accurately based on the value you entered
All-In Price Input Mode
Allows you to input and edit the All-In Price (price with all the customer fees included). All other Price types will be greyed out and cannot be edited.
Upon creation of child layer, in the Price Section, under Price Input Mode, select All-in Price
Enter the All-in Price of the ticket
Upon entering the value of the All-in price, the rest of the price types will also be filled out automatically and accurately based on the value you entered
Once you have set the price for your ticket (either by net price or all-in price), you can continue with the Ticket Creation Process. Refer to this article.
Fee Breakdown Information
With the new update, EVENT Live reinforces its commitment to accuracy and transparency. Both admin users and customers can now view live pricing previews across different areas of the website, ensuring prices are displayed exactly as they will appear.
Admin Side
Option 1: Tickets Page
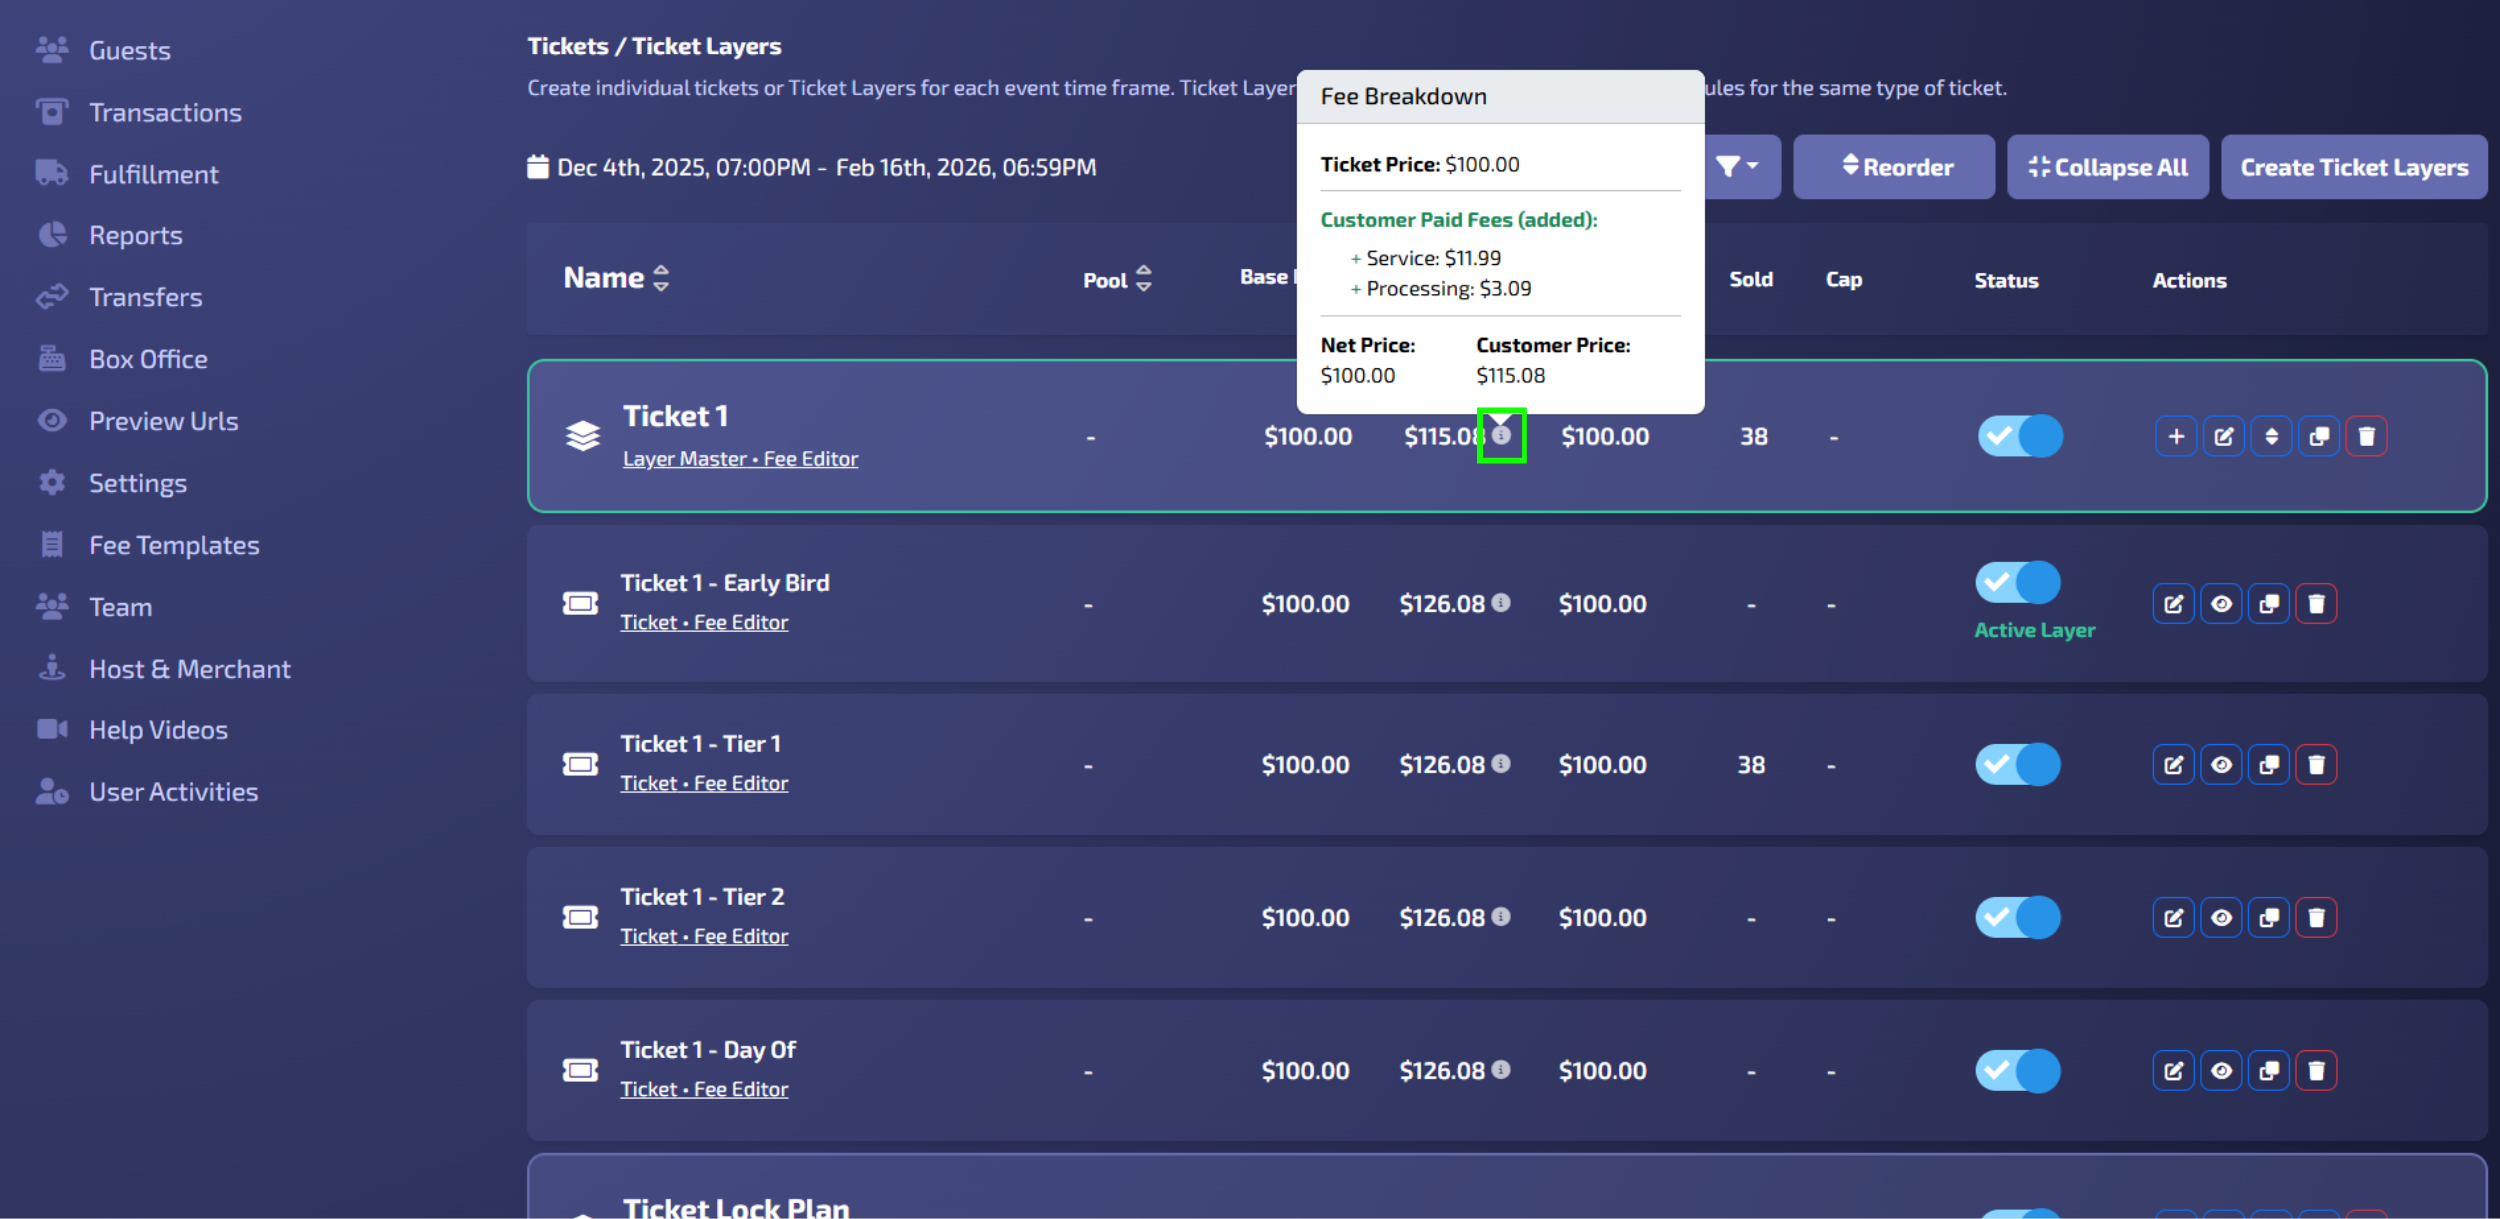
Find the ticket you want to view the fee breakdown
On the All-in Price Column, hover to the information button (“i” icon) to view the fee breakdown
Option 2: Child Layer Edit Window
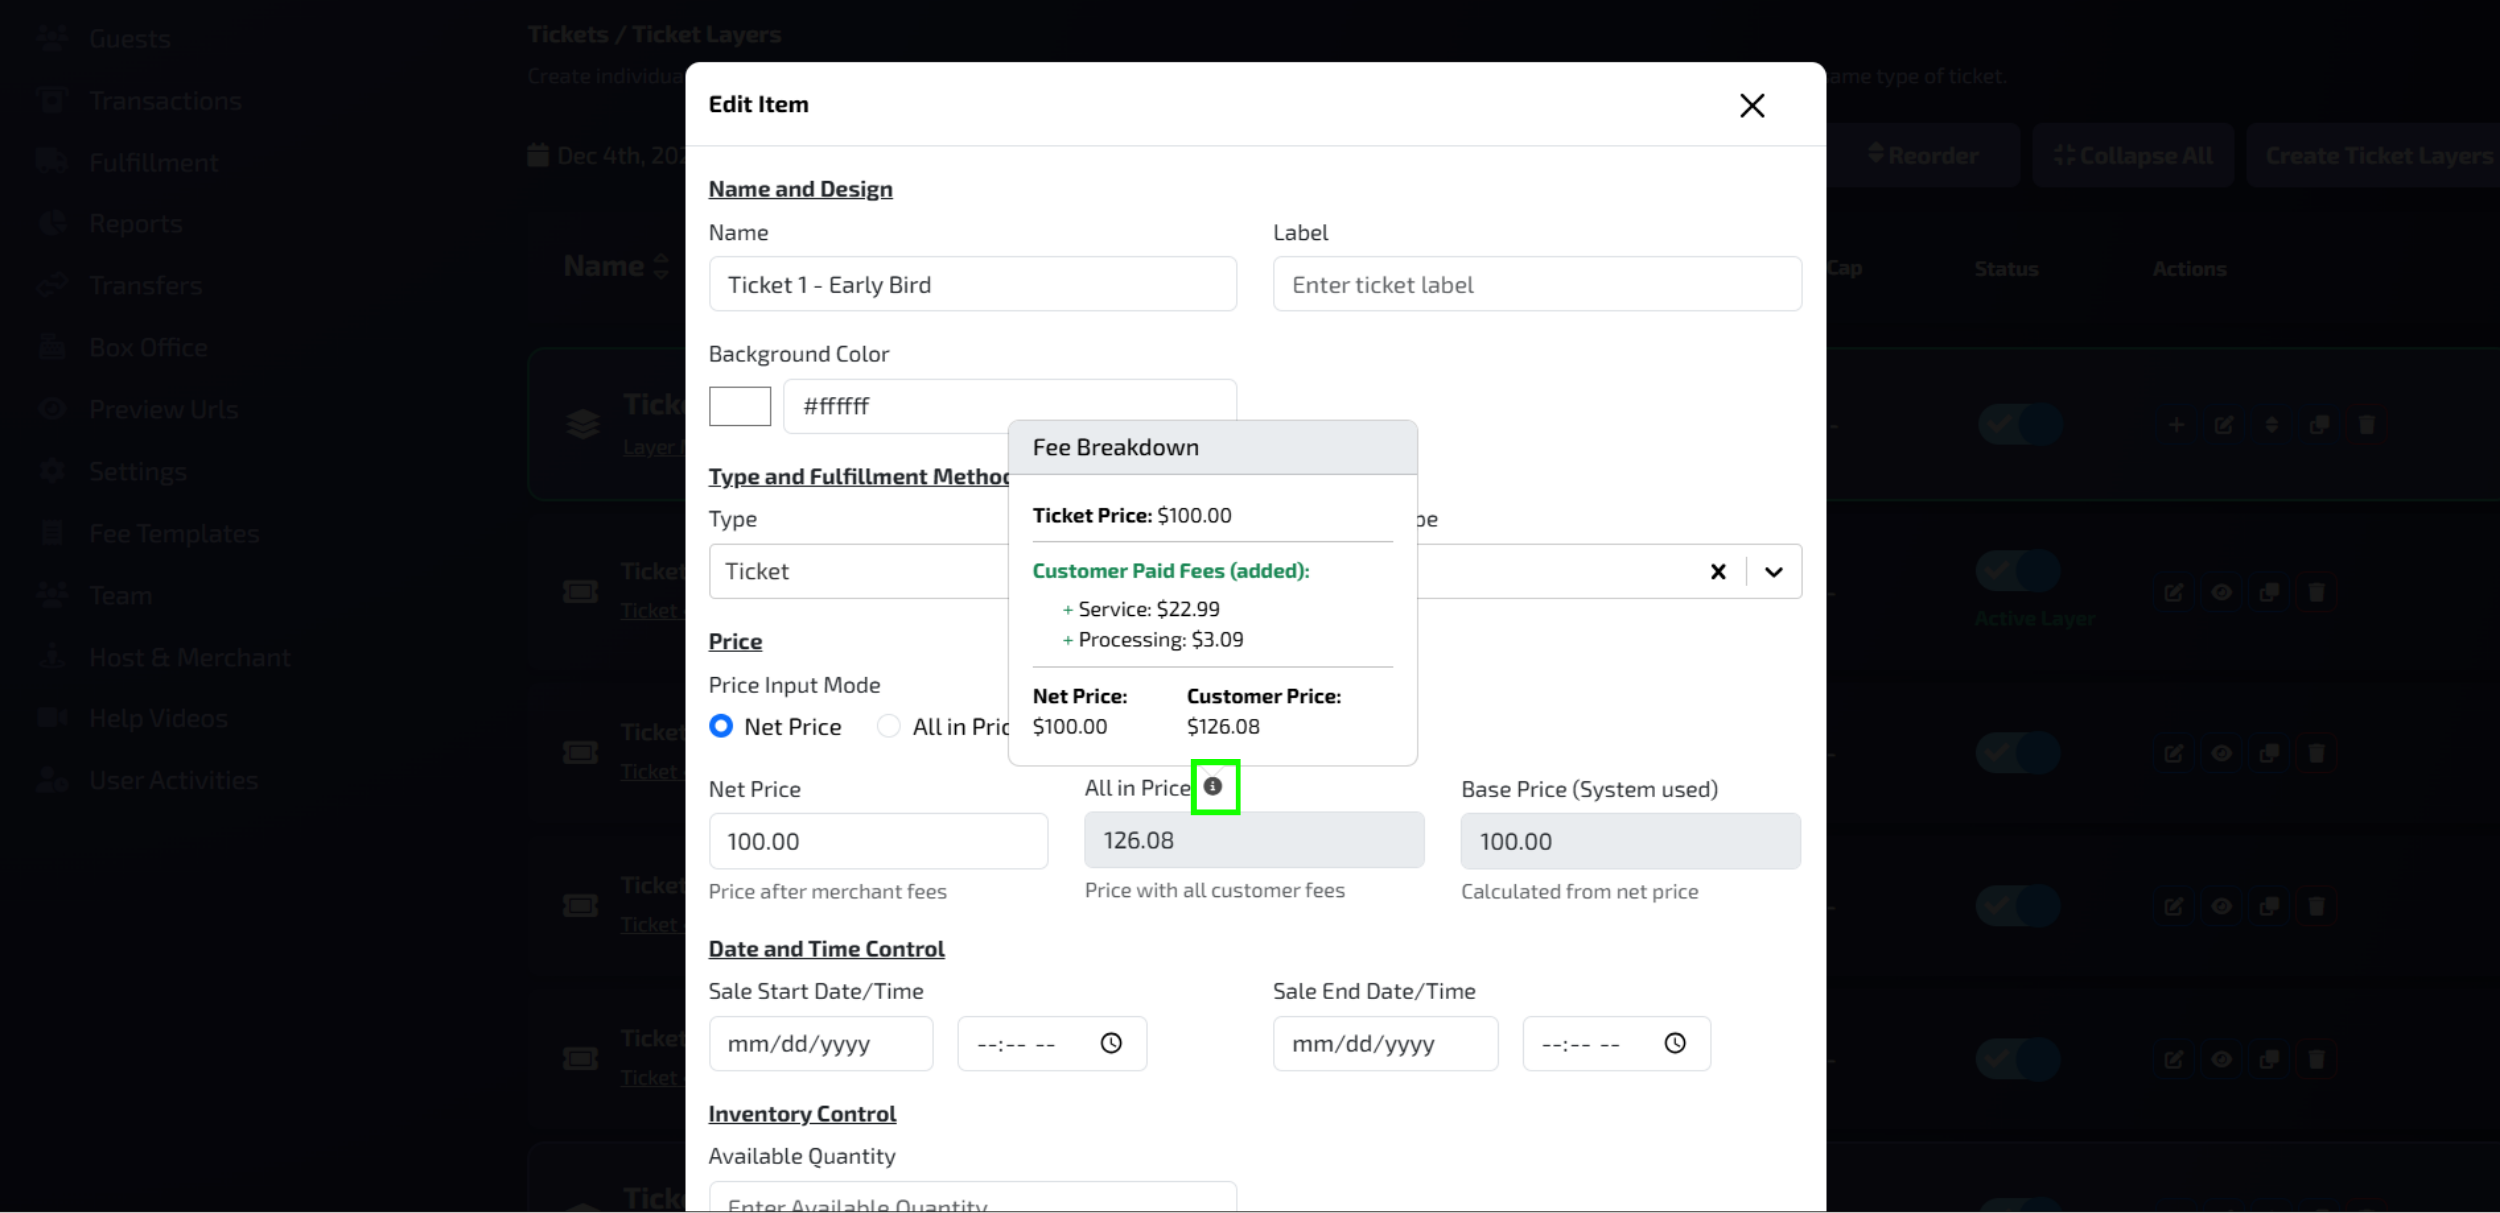
On the Child Layer Action Row, click edit (Pencil button)
Beside the All-in Price, hover to the information (“i” icon) to view the fee breakdown
From there you can view the Ticket Price, Net price, Customer Price, and Customer Paid Fees
Customer Side
To promote transparency, customers can now easily view the All-Inclusive Price of tickets across different areas of the website.
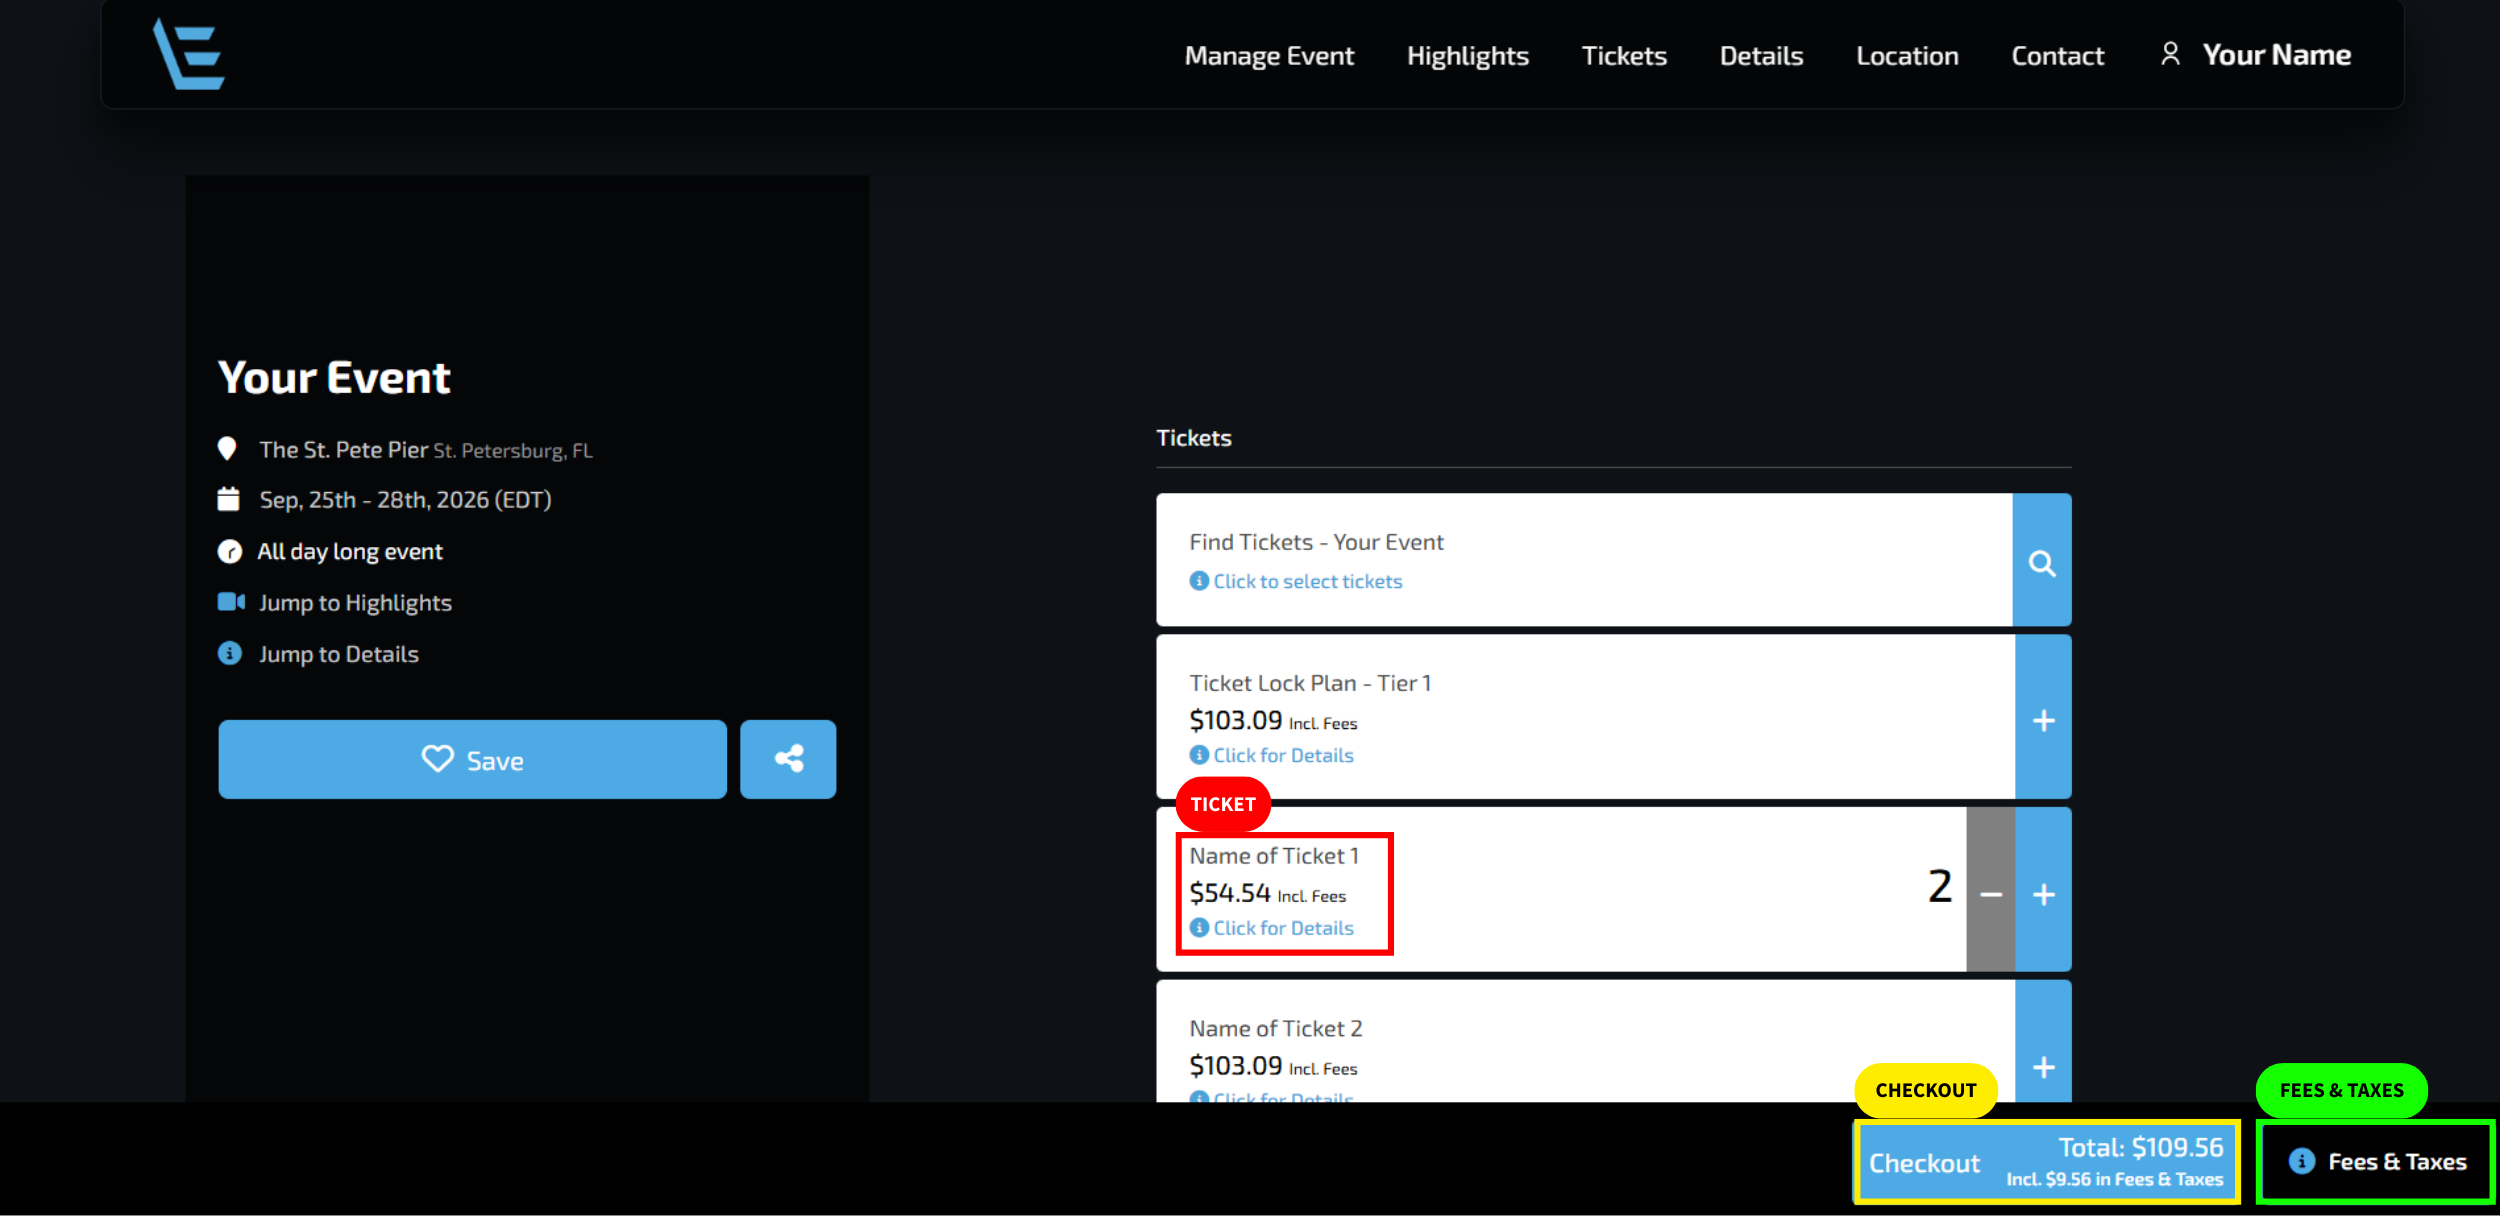
Ticket: The All-In Price is displayed directly on each ticket. A note confirms that the price shown already includes all applicable fees.
👉 Use this to check the all-inclusive price of an individual ticket.
Checkout: Located at the bottom of the screen, the checkout button displays the total all-inclusive price for all selected tickets. This amount updates in real time as tickets are added or removed.
👉 Use this to view the total cost of your selected tickets, including fees.
Fees & Taxes: This button opens the Order Summary, allowing customers to review the breakdown of tickets, fees, and taxes before proceeding to checkout.
👉 Use this to plan ahead and review your full order details.
Frontend Fee Exclusion
Admins can exclude product, event, and add-on fees from frontend calculations while the backend processing remains unchanged.