

Once your tickets are created, you will need to add them to Ticket Channels to make them visible on your event page, Box Office, or Point of Sale. Ticket Channels help organize how your tickets are displayed, making it easier for customers to browse and select the options they need.
Creating Point of Sale (POS) Channels
Point of Sale Ticket Channels let you organize and control how tickets are displayed on your POS system, enabling staff to quickly find, sell, and manage tickets during in-person transactions.
From the Channels Row (Web, Box Office, Point of Sale), select Point of Sale
Name of Ticket Channel
(e.g., VIP, General Admission, Group Sales)
This helps organize your tickets so customers can easily find what they are looking for.Layout Type
List – Displays tickets in a simple vertical list for quick scanning, without images.
Grid – Displays tickets in a grid layout, allowing multiple tickets to be shown side by side for a more visual overview.
Description
Provide additional details about the channel if needed.
Adding Tickets to Point of Sale Channels
Select the product (ticket) you want to add to the channel
This determines the display order of tickets on the web page (lower numbers appear first).
To remove a ticket, click the trash icon under the Actions column
Note: If you clicked Add Item but did not select a product, you will not be able to save.
Once tickets are added, the following options will become available:
Delete – Removes selected products from the channel
Reorder Items – Opens a reorder tab where you can drag and drop tickets to adjust their display order
Verifying Ticket Channel Setup
Ensuring your Point of Sale is setup correct is crucial for a smoother checkout experience. Verifying this is unique and needs to check the POS System directly on the EVENT Live Pro Mobile Application.
Open the EVENT Live Pro App.
On the Event Tab, search for and select your event

On the bottom main panel, tap the Checkout Tab

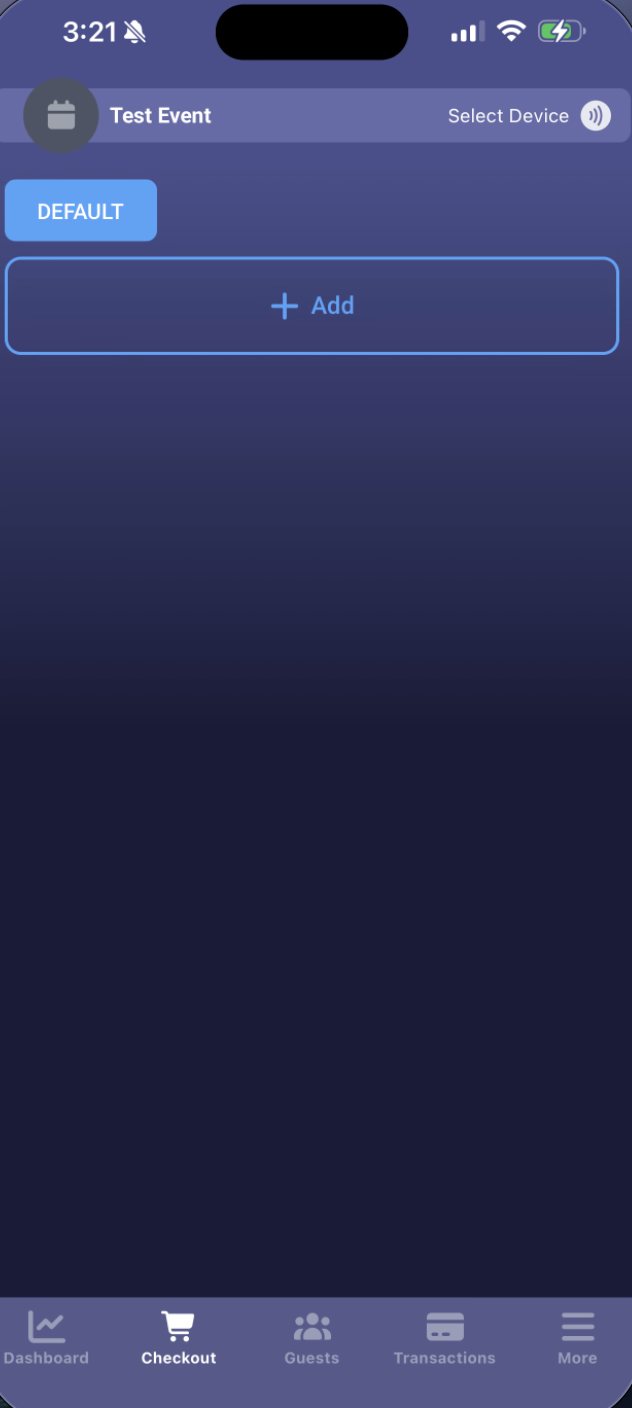
The Checkout page will display all the POS Channels you created
Swipe or tap between channels to view available products

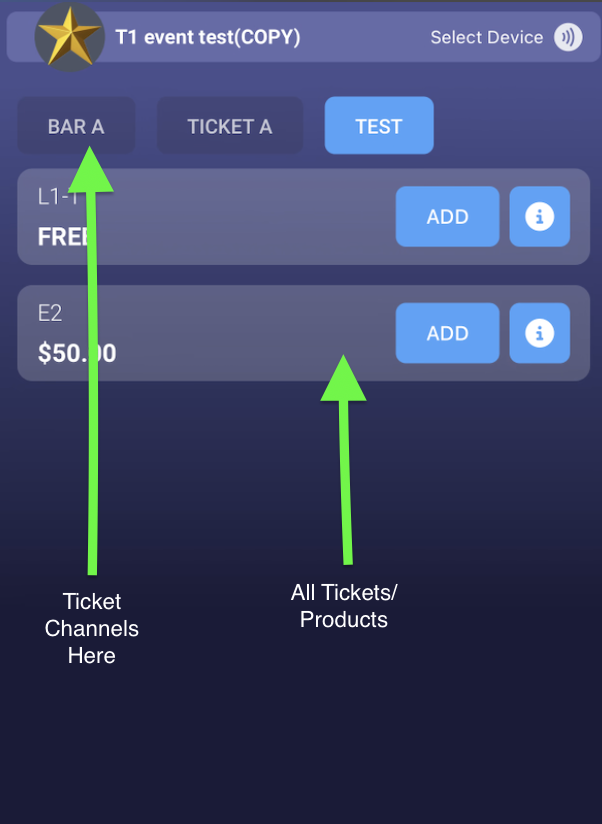
Review the format and display order
Make any necessary adjustments by returning to the Ticket Channels or ticket settings on the EVENT Live Website Page
Why This Matters
⚡ Speeds up in-person transactions by making tickets easy to locate
🧭 Reduces errors by clearly organizing ticket types for staff
👥 Improves efficiency during busy periods or high-volume sales
🎯 Highlights priority tickets like VIP or early bird for quick access
🔄 Minimizes confusion when handling multiple ticket types or pricing tiers
🎛️ Gives organizers better control over how tickets are displayed on the POS system
FAQs
What happens if I don’t assign a display order?
If no order is set, tickets may appear randomly, which can slow down checkout. Assigning an order ensures staff can quickly locate tickets.
Will removing a ticket from a Ticket Channel delete it completely?
No, it only removes the ticket from that specific channel. The ticket remains in your system.
How do I control the order of tickets?
You can assign row numbers or use the Reorder Items feature to drag and drop tickets into your desired order.
Do Ticket Channels affect ticket availability?
No, they only control how tickets are displayed. Availability is managed in the ticket settings.
Is there a limit to how many tickets I can add?
There is usually no strict limit, but it’s best to keep the number manageable for a better user experience.
What happens if I don’t assign a row number?
The system may automatically arrange tickets, which could result in an unintended order. It’s recommended to assign rows or reorder manually.
How do I handle multiple ticket types in Point of Sale (POS)?
Organize them into separate channels (e.g., VIP, GA, Early Bird) so staff can quickly select the right type.
Will POS channels affect online ticket sales?
No, POS channels only control ticket presentation in-person and do not impact online sales.